A device that is activated by the presence of light is known as a photocell. A photocell can help determine when an outside light will turn on and off throughout daylight hours. If you intend to replace the photocell on your outdoor lighting, we asked expert electricians, and here's what they suggested.
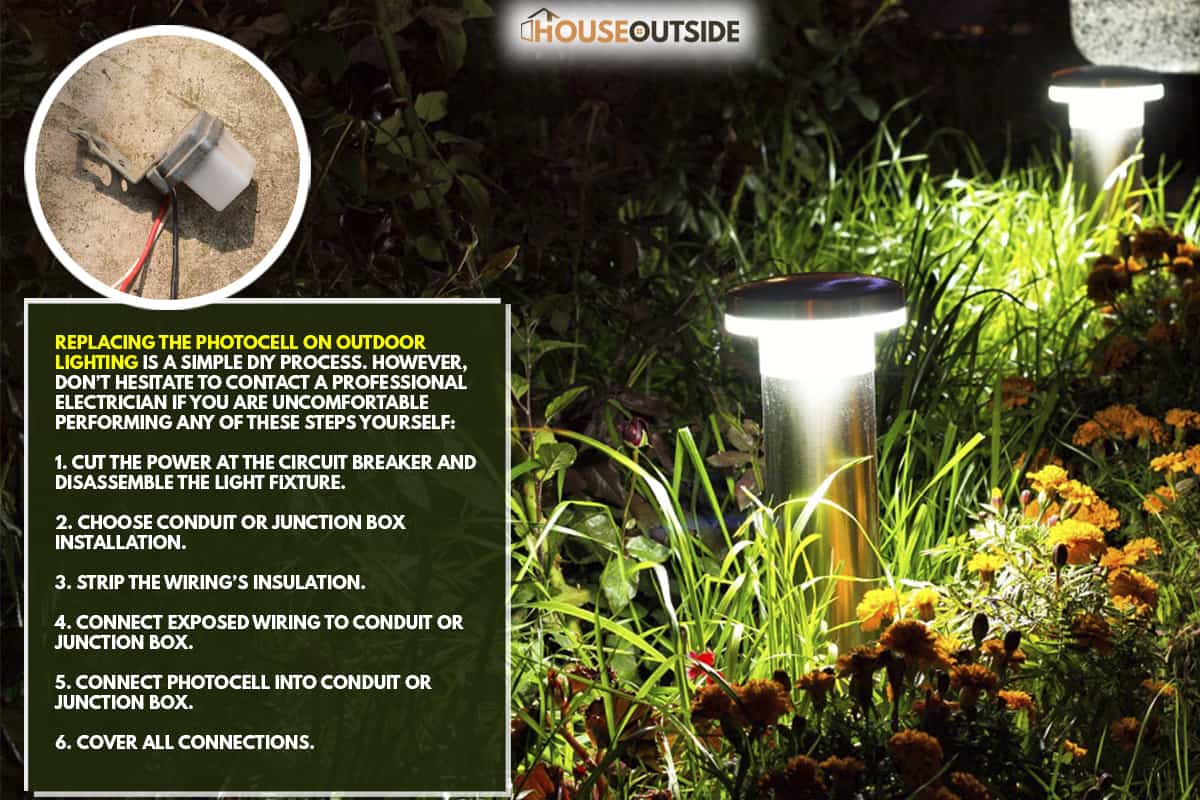
Replacing the photocell on outdoor lighting is a simple DIY process. However, don't hesitate to contact a professional electrician if you are uncomfortable performing any of these steps yourself:
- Cut the power at the circuit breaker and disassemble the light fixture.
- Choose conduit or junction box installation.
- Strip the wiring's insulation.
- Connect exposed wiring to conduit or junction box.
- Connect photocell into conduit or junction box.
- Cover all connections.
This article has explained what you need to understand as regards replacing photocell on outdoor lighting. So stay put and keep reading to learn more.
How To Replace a Photocell on Outdoor Lighting?
To replace a photocell on outdoor lightening, follow these steps:
1. Cut Circuit Breaker Power and Disassemble Light Fixture
Put the circuit breaker into the off position. It is typically kept in a nearby weatherproof "box" that is positioned on the exterior of your house and has an address written on the door of the box itself.
Do not be hesitant to call an electrician for assistance if you are unsure how to turn the power off. By unscrewing any screws that are holding the existing light fixture together, disconnect it from its power source.
After the screws have been removed, you can pull the pieces apart by hand, but you should be careful not to destroy them. To take down the existing outside light, a screwdriver will be needed. Put it away in a secure location so that none of the components get lost.
2. Choose Conduit or Junction Box Installation
When it comes to installing an outdoor light that is equipped with a photocell, you have two choices: the first involves making use of a conduit, while the second involves making use of junction boxes. Both of these can be purchased at a home improvement store.
If you already have a conduit or junction box installed, completing this process should be considerably simpler for you because all of the necessary components will be included in the installation package.
Either way, in order to install your light, you will need to make a trip to a home improvement store to acquire an outdoor light fixture, a photocell, and any other equipment that might be required to do this process.
3. Strip the Wiring's Insulation
Utilizing a pair of pliers, remove approximately four inches' worth of insulation from the cable. Take care not to sever any of the wires located inside the device. If you snip the wires in the right place, you will end up with one exposed black wire and one exposed white wire, in addition to two shielded cables that are still whole.
Using wire strippers, remove approximately one inch of the insulation covering each wire. After this process, you will be left with five wires: one black, one white, and three bare copper (green, yellow, and red). Keep in mind that the wires need to be kept separate so that you do not mistake one step for another.

![]()
Get a wire stripping tool at Amazon.
4. Connect Exposed Wiring to Conduit or Junction Box
Turn each exposed wire end so that it corresponds to the color printed on the reverse side of the conduit or junction box.
It is recommended to secure the wiring, hold it with pliers, or tape it together using duct tape while twisting the ends. It is necessary to link each of the colors to their match. If they are not matched, the light fixture will not function properly. Mismatched wiring could also put you in harm's way.
After securing the large wire nut to the end of the black wire, insert the wire into the conduit or junction box. If you are utilizing a junction box, all you need to do is push the wires to the back of the box and screw it closed using pliers.
While you are fishing something through a conduit, use duct tape to hold everything in place. After being dragged through, turn the huge wire nut anticlockwise.
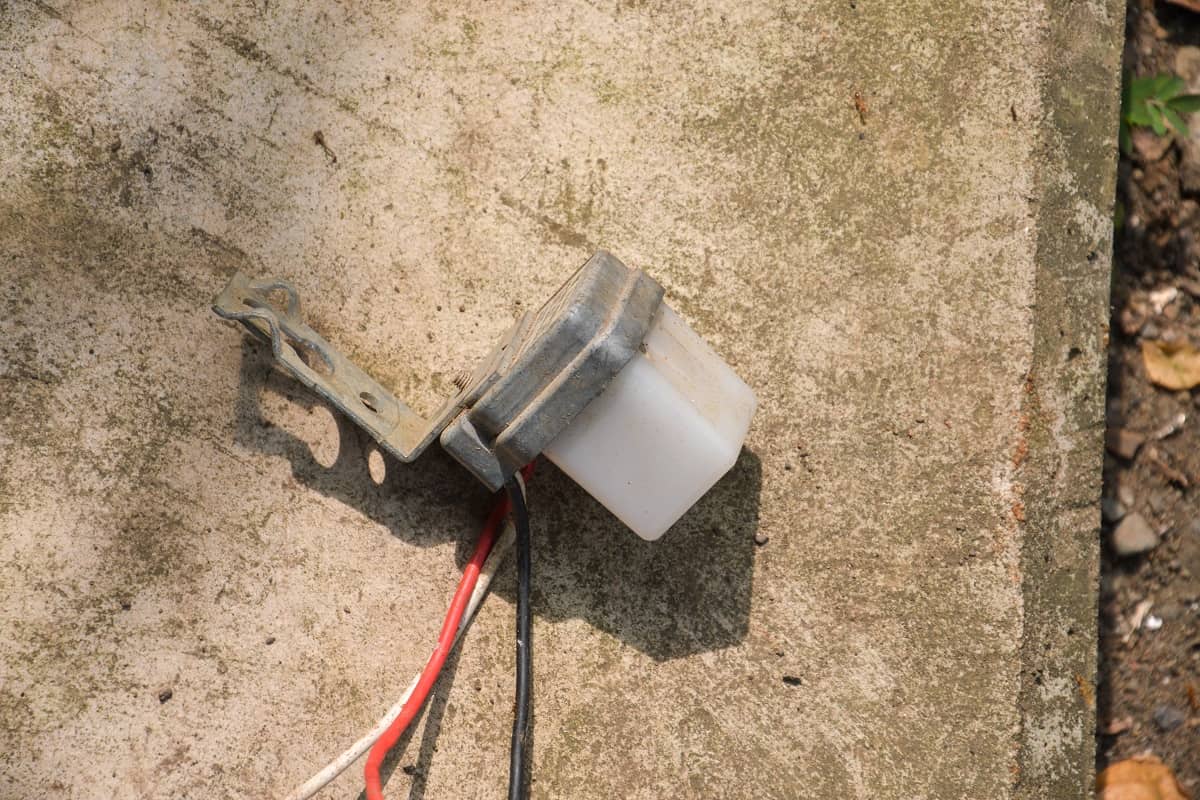
5. Connect Photocell Into Conduit or Junction Box
Simply place one end of the photocell into the empty side of whichever device you're using. After it has been inserted, a little wire nut should be screwed on to secure it. Check that each of the ends is linked firmly and securely. It's possible that you'll also need to alter the little wires on the photocell by bending them in order to prevent them from protruding too far.

![]()
Keep wire nuts or twist connectors handy in your toolkit. Get this set on Amazon.
Using wire strippers, remove approximately one inch of insulation from one of the white wires on your external cable. After that, you will need to twist on a twist-on connector in order to link the photocell and the external cable.
It is important to keep in mind that all of the white wires are linked, therefore it is not a problem if you find yourself at this step with two white wires.
6. Cover All Connections
Applying electrical tape over each of the twisted connections will help keep them from coming loose. If you are using a junction box, just close it and use pliers to tighten any loose connections.
After it has been pulled through, give the wire nut a twist so that it covers all of the connections. Mount the light fixture onto the conduit or junction box utilizing the brackets that were included with the lighting fixture. Check that all of the components are stable, and use pliers to give them additional grip if necessary.
How Do You Change a Sensor For An Outside Light?

Find the light sensor and detach its wires from the wires that are attached to the wall. Unscrew the sensor using the pliers with the needle-nosed end.
After that, position the replacement light sensor so that it covers the opening. Put in some screws to secure the new sensor.
What Causes a Photocell To Fail?
The most typical issue that arises with security lights that are powered by photocells is that they turn off unexpectedly in the middle of the night due to dust or shading. Other issues are mostly electrical.
The cabling that connects the photocell to the primary circuitry of the lighting system is often faulty or loose, which can have a negative impact on the photocell's ability to work.
A secure and soldered connection is required to be made between the wire and the photocell in order for the lighting circuit to function properly. Additionally, the system requires the availability of adequate electrical power.
How Do You Test a Photocell?
The simplest way to test a photocell is by connecting a multimeter set to the resistance measurement mode to the two leads of the photocell and observing how the resistance varies when you shade the sensor with your palm, switch off the lights, or carry out other similar actions.
An auto-ranging meter is useful in this situation due to the frequent shifts in resistance that occur.
Are All Photocells The Same?
There are many kinds of photocells available on the market, but the technology that enables them to regulate the flow of electric current is always the same.
This is because they all make use of semiconductors. After the semiconductor has been subjected to a predetermined amount of light, a current will begin to flow, at which point the light fixture will turn off.
How Many Lights Can One Photocell Control?
Using four (4) discharge lamps, a photocell with a rating of five (5) amps should be sufficient. The utilization of a photocell switch to directly carry the lighting loads, on the other hand, becomes impracticable as the number of lamps that need to be controlled increases.
Why Does My Dusk To Dawn Light Stay On All Day?

The base of the light bulb contains a light sensor that can detect ambient light levels. In order to solve the problem, you should begin by determining whether or not the light sensor is receiving an adequate amount of light to trigger it.
To clean the lights and sensors, use a soft cloth and a drop or two of water. This will remove any dust or dirt that may have accumulated on them.
If the sensor is obscured in any way, the light fixture may incorrectly determine that it is nighttime and continue to operate with the light on. You also have the choice of switching off the circuit breaker that the light is connected to.
Do You Need a Special Photocell For LED Lights?
When the light is turned out during the day, standard photocells continue to function by drawing a very modest amount of electricity.
The low voltage at which LEDs operate, along with the relatively low current flowing through them, results in interference, flickering, and early degradation. Because of this, LEDs call for a different kind of photocell than traditional light bulbs do.
Conclusion
While replacing a photocell on your outdoor lighting, follow the guide closely and ensure you don’t skip a step. Try to be cautious to avoid accidents and ensure you get any material you will be using from a trusted home improvement store.
To learn more on home outdoor construction, check out these engaging articles:
![Roof Gutter Cleaning Tips. Clean Your Gutters. Gutter Cleaning., Do Gutters Smell? [And What To Do About It]](https://houseoutside.com/wp-content/uploads/2022/10/Roof-Gutter-Cleaning-Tips.-Clean-Your-Gutters.-Gutter-Cleaning.-600x400.jpg)